{Photo: Sephora}
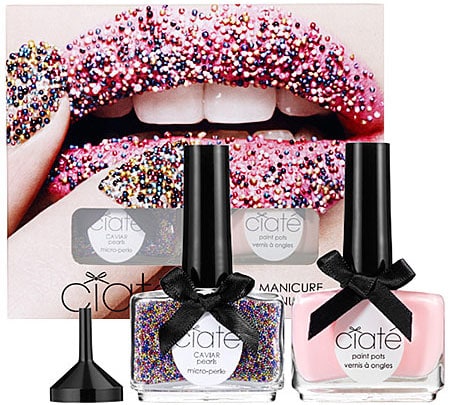
One of the hottest new nail art trends is the caviar manicure, a three-dimensional look created when tiny beads, called “caviar pearls,” are pressed into regular polish. Created by UK-based company Ciaté, the Caviar Nails DIY kit arrived stateside in April and has been flying off the shelves ever since.
In this article, I’ll give you a quick overview of my experiencewith the caviar polish kit, plus some tips for creating unique nail art looks with it.
Table of Contents
About the Ciaté Caviar Manicure Kit
The kit is available in three colors: “Black Pearls,” “Mother of Pearl” and “Rainbow,” shown above, which is the one I bought Each kit comes with one bottle of regular polish, a second bottle filled with caviar pearls, a tray to catch excess pearls during application, and a mini funnel to return the excess pearls to the bottle once you’re done.
Application is incredibly easy: All you have to do is pour the pearls from the bottle onto wet nails and then gently press them in. The tray and funnel ensure a mess-free process.
Is It Worth the Money?
At $25, the set seems expensive at first. However, there are several factors that I think make it worth the splurge:
First, the basic polish alone is fabulous – it’s a nice pale pink that is quite opaque and gives great coverage with just two coats. It dries very quickly, which is great, but also means that you have to apply the caviar pearls immediately so they will adhere. Another cool thing about the nail polish is that it isn’t any special formula, so you can switch it out for any color in your arsenal. Second, the bottle of pearls will last a long time. After doing my nails and those of my two friends, about 90 percent of the bottle remained.
So while the kit is expensive for a college gal, the $25 price tag is not completely unreasonable for a nice bottle of polish and some pearls, and you will get a lot of use out of the kit.
Nail Art with Caviar Pearls
While most people use this kit for full-nail application (as seen in the top photo), I decided to experiment and create nail art using the caviar pearls. Below, I’ll show you three unconventional ways to apply the caviar pearls to your nails:
Ombre
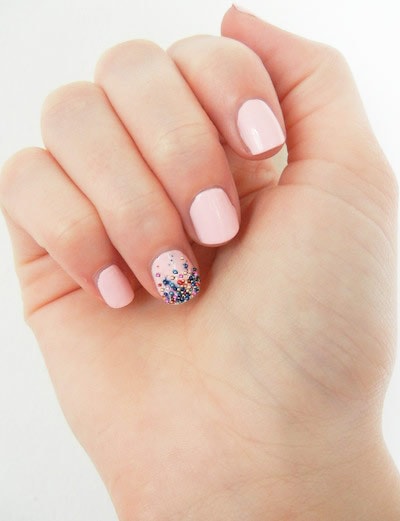
To create an ombre effect with the caviar pearls, take the funnel and put it upside down on the mouth of the pearl bottle. (The widest part of the funnel should be over the bottle opening.) Hold the funnel in place and pour the pearls onto the tip of the nail, keeping the end of the funnel close to the nail. Then, take another finger to pick up a few pearls from the tray and gently press them into the lower half of your nail.
Polka Dots
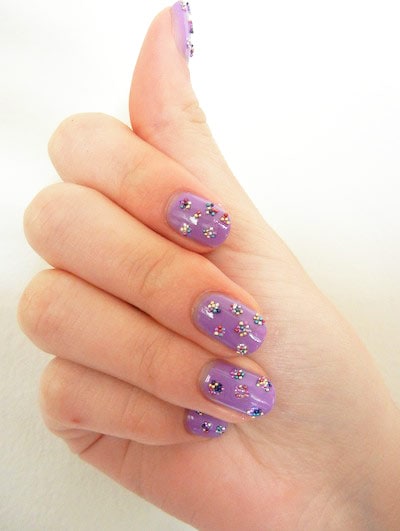
For some cute and easy caviar polka dots, use a bobby pin or small brush to dab small dots of polish onto dry nails. Then just pour pearls over them. Gently tap off the excess and you’re done!
Stripes
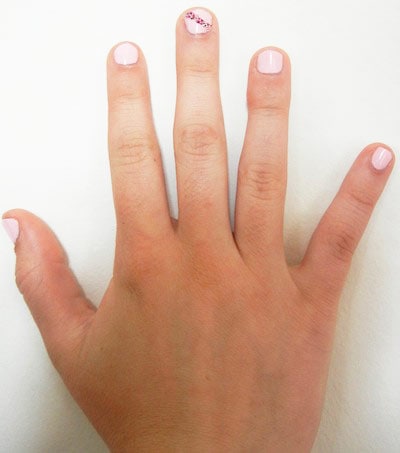
To get dotted stripes, wait for your nails to dry completely, then take scotch tape and place the straight edges on either side of the area you want the caviar pearls to cover. Polish the uncovered area, pour the pearls over the nail and carefully remove the tape to reveal a clean stripe.
Pros, Cons and Conclusions
My favorite thing about this kit was the addition of the tray and funnel. They were super helpful in terms of cleanup, and basically eliminated wasted beads. Also, as seen in the ombre tutorial, the funnel can give you great control over the placement of the pearls, which opens up possibilities for countless designs.
A few other things I loved about the kit: First, the caviar pearls come off easily with regular nail polish remover. Second, like I said above, application is a cinch. Last, but certainly not least, the caviar manicure looks, frankly, incredible.
However, there is onemajor drawback to the caviar manicure: While your nails may look great, they won’t last long. On the back of the box, it says that they can last up to 48 hours, but my friends and I all had a few pearls pop off within two hours of application (though it wasn’t super noticeable). I tried to apply a top coat to make them last, which the instructions advise against, and it was immediately clear why: A top coat will make the colors of the pearls run and mess up the look. Therefore, this isn’t a great everyday manicure because it just doesn’t have staying power.
In summation, caviar nails are perfect for special events – they make a huge statement and look fantastic. Just don’t expect them to last all week. Overall, I say give them a try – they’re both fun to do and absolutely adorable.
What Do You Think?
Do you like the look of the caviar manicure? Would you shell out the $25 to try it out yourself? What look is your favorite, or would wear them in a completely different way? I’d love to see your thoughts in the comment section below!
okay so i got these on sale and i love them so much!!! if you put clean/top coat on the ends/tips of your nails they stay on for WAY longer
You can also get the look for much cheaper by buying micro-beads and regular nail polish instead of using the kit! 🙂
I like nail polish that tends to last me awhile so this probably isn’t the nail polish for me…although it looks pretty cool 🙂
Wow! Those are really cool! But $25? I know nailpolish is only suppose to be $5, of course this IS an exclusive design.:(