Setting up an electronics work area is a highly personal and situational affair, with many interesting problems to be solved, and for many of us, significant budget constraints. The requirements for electronics development vary wildly depending upon the sort of work to be undertaken, but there is core equipment that many of us would consider a bare minimum for usability. [Badar Jahangir Kayani] is at the start of his career as an electrical engineer, and has documented the kitting out of his personal work areas for others to learn from.

As we already touched upon, the cost is often the main driving factor determining what we end up with, and this cost-vs-performance/quality tradeoff is what makes some of us fret over a buying decision. Buying secondhand off eBay is an option, but a lack of warranty and the unknowable condition are not great selling points.
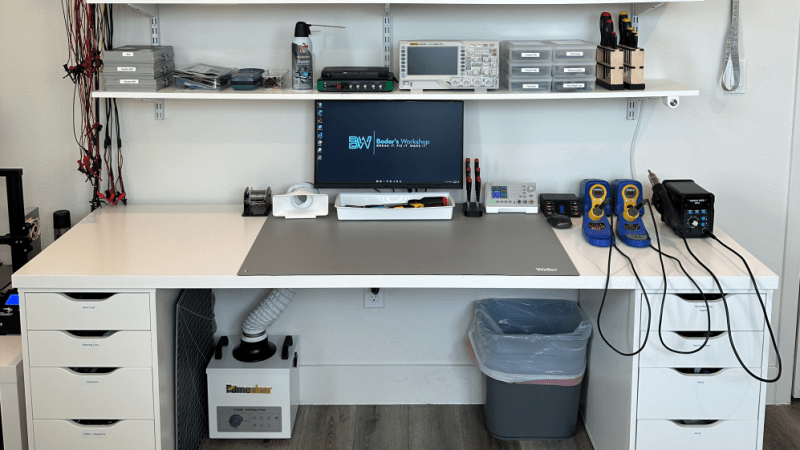
[Badar] has a good grasp of the basic concepts of usability, such as keeping the most frequently used tools, instruments, and components out in the open. Less frequently used stuff is stored in drawers, bins, and compartment boxes. Buying the same storage systems keeps things as consistent as much as possible since it makes storing them easier. We were particularly interested in the use of the cloud-based database solution, Airtable used to create a parts database for minimal outlay.
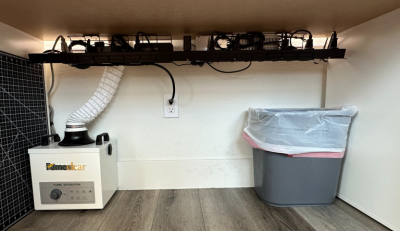
There is also a lot of detail about how to walk that cost/quality/performance tightrope and get the best-valued gear currently on the market. Some notable examples are the UNI-T UT61E Digital Multimeter for general test use, the Controleo3 reflow controller for SMT assembly, and the Omnifixo OF-M4 magnetic fixament kit for that fiddly wiring part. [Badar] also recommends the FumeClear Solder Fume Extractor, although they lament that particular bit of kit is still under evaluation.
Obviously, we’ve talked about work areas a lot on these pages, like this time. For those with more space, this flippin’ awesome bench will be of interest, and if space is tight (or travel is a regular thing) might we suggest this 3D printed DIN-rail mounting cube as a starting point?


A built-in mini fridge is a must for me.
For storing ________?
You know, solder paste!
Build a beer-&-snax robot to go get it for you!
my next electronics workbench will go in a new
off grid battery building,7’wide,14’long,and tall enough
for full hight and over head storage,say 8 ‘ sloping up to
12’
have a number of upgrades on my wish list,excess power
when in float going to a heat pump for water heating and
a larger 10kw wind turbine I want to set up to run “wild”
to heaters in a green house
so lots of room needed for 440v transformers and big
bad ass switching diodes…….away from the house
This is amazing. I can’t say I have seen a better writeup of something like this. Must resist the urge to duplicate it, already have too much stuff.
Make sure you don’t store those parts bins anywhere near a window or they will turn to dust. Ask me how I know. Though modern houses probably have UV blocking windows.
Don’t forget to include an AR setup.
https://hackaday.com/2023/05/29/open-source-ar-hack-chat/
Hard NO on that outdated overpriced worst UI ever soldering iron. This isnt eighties anymore, dont buy soldering irons with separate tips over heater. Consider cartridge style only, either C245 or T12. There is already suggestion for buying 24V supply, perfect for powering ~$30-40 controller+handle+tip combos.
Btw its an Amazon affiliate link farm article …
I’m still enjoying using my Weller Magnastat TCP 24 from the 1970s.. ^^
It’s from the same era like the classic science fiction film “Silent Running”.
And the Weller just simply lasts, its old tip might be the original tip from ~50 years ago, even.
Working with it is like working with an old friend. To me, it makes working with electronics much more real.
All the other soldering stations I tried feel so lightweight and unreal by comparison, not sure to explain.
not sure what your experience is. and i know mine is almost nil — i’ve only used 4 soldering irons in my life and today i use whatever the cheap “great value” temperature controlled iron they had on sparkfun 8 years ago. (yeah the tip is separate from the heater)
but i think i can relate to “feel so unreal by comparison” — you pick it up and it doesn’t feel like the tool you expect, it is hard to believe it even works! and the cure for that is to simply use it, and see that it works…and then seeing is believing!! it’s amazing that just about anything can become an extension of your arm, simply through repeated use. you learn real quick whether it’s garbage that falls apart on you or something you can depend on. hopefully it isn’t a struggle to learn it well enough to reflexively not touch the hot part :)
heh but i completely agree with you, once you’ve got something you know and trust, why mess with it.
the upgrade from an iron that takes a few minutes to heat up and then you want to adjust the knob to one that heats up in about 10 seconds and holds the steady temperature was a big improvement but the next upgrade i’m after is one that cancels out my tremor.
I worked at a company which had JBC nano. I could never go back to T12…..
“All the other soldering stations I tried feel so lightweight and unreal by comparison, not sure to explain.”
That’s gravitas.
https://en.wikipedia.org/wiki/GPO_telephones#Statesman_and_Tremolo
So, the more it is affected by gravity, the more people think of it as quality.
B^)
I’ve had many setups. My first setup was using an old coffee table and sat on the floor. Over time I switched to a desk and to this day I still use a much bigger desk. I have all of my test gear on a rack, Soldering station behind me on another desk. All of my parts are in drawer organizers and coin envelopes. No where as clean as that guy’s setup but cleaner then the late Jim Williams workbench.
I started about 20 years ago with a bare room.
I tried to imagine all the types of things I needed in a lab, then I learned all about ergonomics before building anything.
I started with lighting and electrical outlets – 4 eyeball inserts at 200 watts each for 800 watts of lighting coming to 1 switch on the wall next to the door. Then double duplex outlets around the room, no outlet is more than 6 feet away from its neighbors. The bottom outlets are live, the top outlets all come to a 2nd switch next to the door. The theory is that I can have an experiment using live or switched power. It can be
turned off with a flip the switch when I leave the room. Also, the soldering iron is on the switched circuit, so I don’t have to wonder whether I remembered to turn it off.
Tools and storage should be on the walls, and workbenches in the middle – not the other way around. This lets you have a project that you can access from both sides of the workbench, which is sometimes useful.
Stand up, place your right hand on your right shoulder, and measure the height of your elbow: this is the height your workbench should be. It’s the right height for lifting something heavy on/off a surface.
Soldering and typical assembly should be done with the surface at breast height, so with the notes above get a wooden chair and saw off the legs until the table height is right. Bending over the work area is a BIG NONO, and will cause back pain and over time cause your brain to associate pain with electronics, and can completely drain all love of the hobby.
I have an artist’s chair with adjustable height for non-soldering/non-assembly work – it swivels easily and doesn’t have arms to interfere with grabbing and/or manipulating things. I can spin it around backwards, grab jumpers or other often needed things, then quickly swivel back to the project at hand.
All tools should be visible. So many times I need a tool and purchase it, only to find that I already have one of those. Keeping tools in drawers or totes means “out of sight, out of mind”. You should be able to look up, grab the tool you need, then look down again. Leaving the chair to get a tool is right out.
Some tools are infrequently used or really big (ie – table saw), so those get special treatment, but in general my work area is festooned with all sorts.
Here’s one corner of my work area. The pegboard in front goes all the way up to the ceiling, the pegboard to the right goes about twice as far as shown, all sorts of tools hanging in plain view.
https://hackaday.io/project/5283/gallery#b2545e4e2df8f2cb72f933bafc5c95c1
Table at breast level to solder? That means your elbows rest on the table and you pivot off them to solder?! I can’t envision this being comfortable.
Can you explain more?
Search online for ergonomics of table height. There’s a range of table heights for a range of actions: if you’re manipulating heavy items the table should be belly-button height so you can get over top of the item.
For tiny and delicate work, you want to rest your elbows on the surface to form a sturdy brace for your hands. Also, a higher table brings the work closer to your eyes.
You brace your forearms on the table (edge) and solder using only your wrists and hands.
I’ve learned more from your comment than from the post itself.
A couple of years ago Wood [TM] magazine had a series of articles about building up a shop for beginners. IIRC, $50 per month is set aside for basic tool/bench item purchases and assembling bench and storage. For those starting out with limited budgets it gave guidance about what tools were needed before buying specialty tools that would have limited use.
Hi! I highly recommend reading early radio tinkerer’s books / amateur radio books.
The ones from the 1920s to 1950s do explain how to create your own shack in great detail, way down to the furniture.
With a bit of wood working, someone can built his/her/their own desktop/workbench with bare hands.
Complete with built-in power connections for experimentation..
Anyway, it’s just a recommendation, since the radio tinkerer was the proto maker, so to say.
Other hobbies do have similar roots, like model making (r/c planes or ships, model trains, ships in a bottle etc).
The profession of the clock maker also requires a fine workbench, for example.
We all want the perfect setup and what’s perfect for one might be unpractical for another.
But in the end it all comes down to:
– available space
– available funds
And eventually you gather more stuff which wasn’t anticipated for.
And keeping your workspace clean and uncluttered is another thing.
Tip: If you don’t have enough space for a separate work room/hobby room..
An old piece of furniture, the escritoire (secretaire), is an ideal mini workbench for the living room/bed room.
You can do a bit of soldering or measuring here (don’t forget to use a desk pad!), store your instruments or ham radios etc.
Ideally, it can also be locked by a key, so other people can’t access your precious stuff without asking.
That’s especially useful for an ham radio station, which requires a licensed operator (for transmit).
Otherwise, you, the station owner may get into trouble if a curious, unlicensed visitor starts talking over radio (playing around) without permission.
If you can’t afford a escritoire/secretaire, please do consider a breadbox (the wooden type.w/ roll flaps)
It’s almost the same thing, just a bit smaller. Still ideal to house your ham transceiver or CB radio..
Depending on the type of model, it may even don’t look out of place on your desktop/workbench! :)
It’s ideal for protecting your stuff from dust and keeps things tidy!
PS: Another tip for a workbench / miniature shack: Use an old wardrobe.
With a bit of phantasy, it can become a great miniature lab or secret ham shack!
An unused wall closet would be even better, if you have one. :D
Tip of the hat, well done, but wow, this is creepy because I have nearly the same setup. Two black Alex drawer units holding up an IKEA laminate worktop and a shelf above the worktop. ESD mat across the whole surface. My Tektronix scope looks nearly the same also. Put it together about 6 years ago and still love it. When the bench is not in use, I also have the wider Alex drawer unit that I roll under the center. When pulled out and to the side of where I sit, it adds an additional 18×26 work surface.
A difference with mine, which I would recommend for his since he has the perfect space for it, is an outlet strip mounted on the wall just under the shelf. Mine is a Tripp-Lite PS4816 and the outlets are always accessible because I never put things tall enough to reach the shelf. All temporary items (heat gun, scope, etc) get plugged into that strip; permanent items go under like he has.
Final note: His is WAY cleaner than mine…………
Same!
I’ve got exactly the same desk/drawer combination.
It’s just really well suited as a workbench. The desk is quiet low, has a decent width and the drawers are super deep.
Gridfinity!
Yeah! With you brother!
too clean throw it back
I was about to say, I’m still working on idea no. 1: clean up enough to see literally any portion of the bench surface. This may be too far towards the opposite extreme.
This really helped my organize my thoughts about my current attempt at organizing….not that this article was necessarily about organization, but since thats one of my current projects, its where my mind went.
My problem is with inventory…and the inventory problem makes the workspace so disorganized, it really is the first thing I personally need to tackle. The comment that he makes about having over 1000 unique parts is what is so daunting to me. I don’t have that many, and I can already see where keeping a “parts wall” sorted would be nightmarish. I know people do it. I even know we can use computers and voice assistants to prevent needing to sort the parts wall. In my mind, this was just not a tenable solution. It was thinking about commenting that really got my thoughts organized about what I’m trying to do and why. Briefly, I want a “project tackle box”. Why? because that’s how I am currently storing my components….just replace tackle box with cardboard box from mouser/digikey, and the dividers in the box with mylar bags. The frustration level is high, the organization level is low, and the messiness level is high. However, the big epiphany I’ve been searching for came while thinking about this article. Opinions are just opinions, but the opinion/epiphany I was searching for is that what I personally want out of an organizational system, is for it to be as natural to me as possible. Burdensome but clean will never be used. It’s led me to use the phrase “Cleaning up/organizing is just choosing where I will lose things” because its so unnatural to me. Yet I know I need an uncluttered workspace. Finally figuring out the natural part is the key. So, to the organizing project, in case anyone else finds this method of sorting to be natural (I can’t be alone….maybe not a majority, but certainly not alone…..right?!) there are 2 main problems with non-passive component storage. Moisture and static. Parts walls seem address these in a terrible way, mylar bags. Frustration level is high, visibility is low, and moisture protection, long term, is low. Overall, IMO, not good. So if you’re going to use a tackle box concept, might as well start with the gold standard for moisture blocking of HDPE, and start with the best company for this sort of thing, pelican, specifically the vault series is HDPE. G/Flex 650 epoxy can bond various plastics including HDPE and ABS. So now we can 3d print things to go inside the vault case, and glue them in place. I want to experiment with gridfinity….I mean, its a grid, what’s not to like! The “ecosystem” around it might be of use for organizing other aspects of my bench, so why not?!. So I made a bar with heat set inserts, glue that to the vault case, print a gridfinity base with screw holes to mate up. Now I have a pelican vault case with a gridfinity base (Now that’s thinking *inside* the box!). My bins are designed with a space beneath the parts storage for silica gel, and a grate to allow it to absorb moisture from the bins. There shouldn’t be much, only what gets in when the case is open as well as a tiny amount from the environment. It should last for a long time. For antistatic components, I still don’t want mylar bags. They’re just obnoxious IMO. So, for the price, I’m looking at protopasta’s conductive PLA. Print the bin from a conductive material, and we’re on the right track. All bins will have lids that are fairly tight fitting. The conductive bins are no different, just with conductive lids. That should be enough to keep moisture out. If not, I think there may be conductive TPU, maybe even some cots parts that would allow a conductive ring around the lid to complete the seal. If not, a little aluminum foil “gasket” would probably suffice. I’m less worried about having to reach in for parts, since when using SMD stuff, you’ve probably got tweezers handy.
This may still be a horrible concept. In my mind it seems to fit what is natural to me because I’m already trying to do it without the proper bins! Of course, there is nothing like experience to judge the validity of any system/claim. So I’m just going to have to use it to find out! If it works, I may expand the concept to lesser used tool kits (like my PCB repair toolkit – I never actually want to have to use it, but want it handy for when I need to use it!) and other clutter if it works well. I’ll have to follow this guy though to read more about what he has to say. Even it its not something that will work for me, it helped me form my thoughts on organization, which will help in areas outside my electronics bench…in fact, it will help in just about any endeavor which needs organization (which is any endeavor that grows to needing more than a small handful of physical or virtual “things”).
I’ve given up using drawers for components. You invariably find yourself with more categories than drawers, half empty drawers and others oveflowing.
Instead all my components fit in a single, large box. I then use nested ziplocks with codes. For instance bag A contains smaller bags AA,AB and AB contains smaller ones ABA and ABB etc.
I also don’t bother to attempt creating categories. I just keep a gdocs sheet where I record each component type and the bag code. So, for instance, AAA could be 20 ohm resistors and AAB could be Arduino Boarads, they don’t need to be of the same type as I can always CTRL+F on the sheet.
Locating a bag is extremely fast as, at each level, you only have a bunch of bags. For instance in my case when you open the box I have only 10 large bags A to J, each contains at most some 10 medium ones with another 10 small ones each inside.
I organise my components in a similar way. Lots of big boxes labelled A0,1,2, B0,1,2, etc. based on physical size of packages and rough association. i.e. ESD bags of ICs in A0, Connectors in A1, but larger packs of trayed parts in B0, and tubes in C0 that sort of thing. Then I add those bins as location numbers in Partkeepr. I keep a rough note on the front of each box with a drywipe, so I can eyeball the approx. part contents, and make a note if I remove stock to update the database with parts removed and parts added, in bulk as an admin task. Partkeepr also managed datasheets, which is a nice way to look things up fast.
I found that file folders and file cabinets work best. I create a hanging file folder for categories, like amplifiers or caps between a range, then put bags of parts in the hanging file folder. This works great as when you get large folder, break up the category into multiple ones. It also works great for reels of components.
While a pretty good write up, articles like these are pretty common. The more interesting article is the one on the same site that list the various components you should stock. Trying to find a list like that is much harder. I get that it really depends on the type of projects you work on, but as this list proves, there is an overlap of common parts that you could use on any project. Now, if only I could find a similar write up (the article linked here is a decent start) for hardware (screws, bolts, nuts, etc) so I can build a collection of those, that would be great.
I’ve grown up over a long time with a bench in the corner and lots of stuff everywhere. Time is what layers things and like things together sooner than any database chaos. Lots of stuff in little space. 50 to 70 hand tools in about a cubic foot on an arm that swings out of the way or at hand with groups poked into plastic bottles with the tops cutoff inside of a larger cookie tin on the arm. Everything is repurposed finds or gifts like the resistor bins in groups of 2 of standard values.
My parents lived through the depression and WW2. It’s not make do but make things that do.
So a nice way to do lab bench is to buy two of these from harbor freight: https://www.harborfreight.com/145-in-end-cabinet-green-64971.html?_br_psugg_q=side+cabinet
Then laminate two pieces for plywood together and make a top. Some polyurethane and stain for a finish. Add shelving on top and power strip for a nice work bench.
The toolboxes are very very nice to store tools, soldering iron tips, etc.